
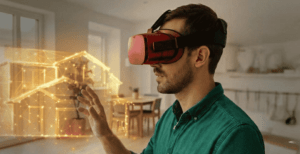
You know, visiting a school or college in real life isn’t always possible. Some campuses are huge, with many buildings, classrooms, labs, playgrounds, hostels… you name it. Just looking at pictures in brochures doesn’t really give you the feel of the place. Videos help, but they don’t let you look around yourself. That’s why 360° image tours are actually pretty useful.
With these tours, you can basically walk around the campus digitally. Move from one building to another, peek into classrooms, check out labs, wander on the sports field, and even see the cafeteria or hostel areas — all from your phone or computer. Feels almost like being there, honestly.
What Is a 360° Campus Exploration Tour?
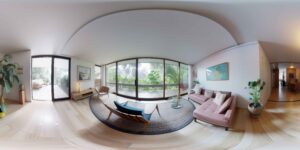
So, here’s the deal. Someone takes panoramic photos all over the campus and connects them. You get to move wherever you want, turn in any direction, and explore at your own pace.
It’s not a video you watch from start to finish. You control where to go and what to look at.
People usually use this for things like:
- Admission and orientation stuff
- Showing students and parents the classrooms, labs, and playgrounds
- Giving virtual introductions to teachers or new students
Basically, anything that helps someone understand the campus without actually going there.
Why Schools and Colleges Use It
- Cuts down the number of times parents or students need to visit
- Helps people understand the layout — so no one gets lost on day one
- Shows practical areas clearly: labs, workshops, libraries, computer rooms
- Everyone sees the same thing — no missing info
- Makes orientation more fun and less confusing
Areas You Can Explore
- Main gates, reception, office areas
- Classrooms and lecture halls
- Science labs, computer labs, skill or vocational labs
- Libraries, seminar halls, study zones
- Sports fields, courts, and other activity areas
- Cafeterias and hostels
Pretty much any area can be included. If there’s something private or restricted, it can be skipped.
How They Make These Tours
Step 1: Figure out which areas matter most
Focus on classrooms, labs, and playgrounds—the spots everyone wants to see.
Step 2: Take panoramic photos
Make sure lighting is okay and it looks natural. Don’t stage it too much.
Step 3: Connect the images
Stitch them so moving from one place to another feels smooth, not like jumping randomly.
Step 4: Add labels or notes if needed
Stuff like “Physics Lab,” “Library,” or “Cafeteria” helps people know where they are.
Step 5: Test it
Walk through it yourself. Check if it’s easy to navigate and nothing looks weird.
Step 6: Share
Send the link to students, parents, and teachers. Perfect for orientation, admissions, or just letting people see the campus.
Benefits
- Makes distant campuses accessible
- Helps students and parents understand the campus layout
- Safe — no need to actually be there
- Time-saving and convenient
- Gives a real sense of labs, classrooms, and playgrounds
Who Uses It
- Students and parents
- Teachers and trainers
- Admission and orientation staff
- Education planners or coordinators
Honestly, 360° campus tours make life easier. You get to explore the place digitally and understand it properly without traveling. For orientation, admission, or just getting familiar with a campus, they’re practical, simple, and useful.